
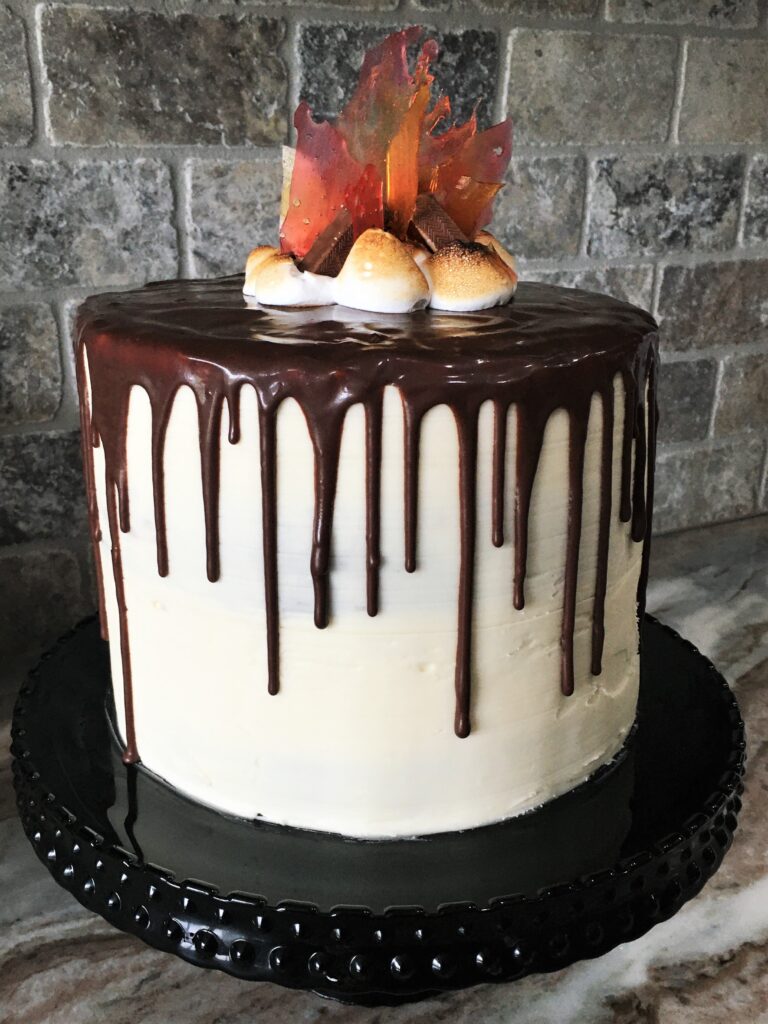
You may be in the camp of folks who think more is just more, not better. I often reside in that camp myself. I do, however, occasionally take a walk on the wild side, like I did with this cake. For this beauty, I adopted the temporary motto of: More is definitely s’more better. Don’t pardon the pun. I worked for that one.
This cake was created for a young girl’s camping birthday party. This iteration is pretty gourmet since I know she is a girl with distinguished tastes.
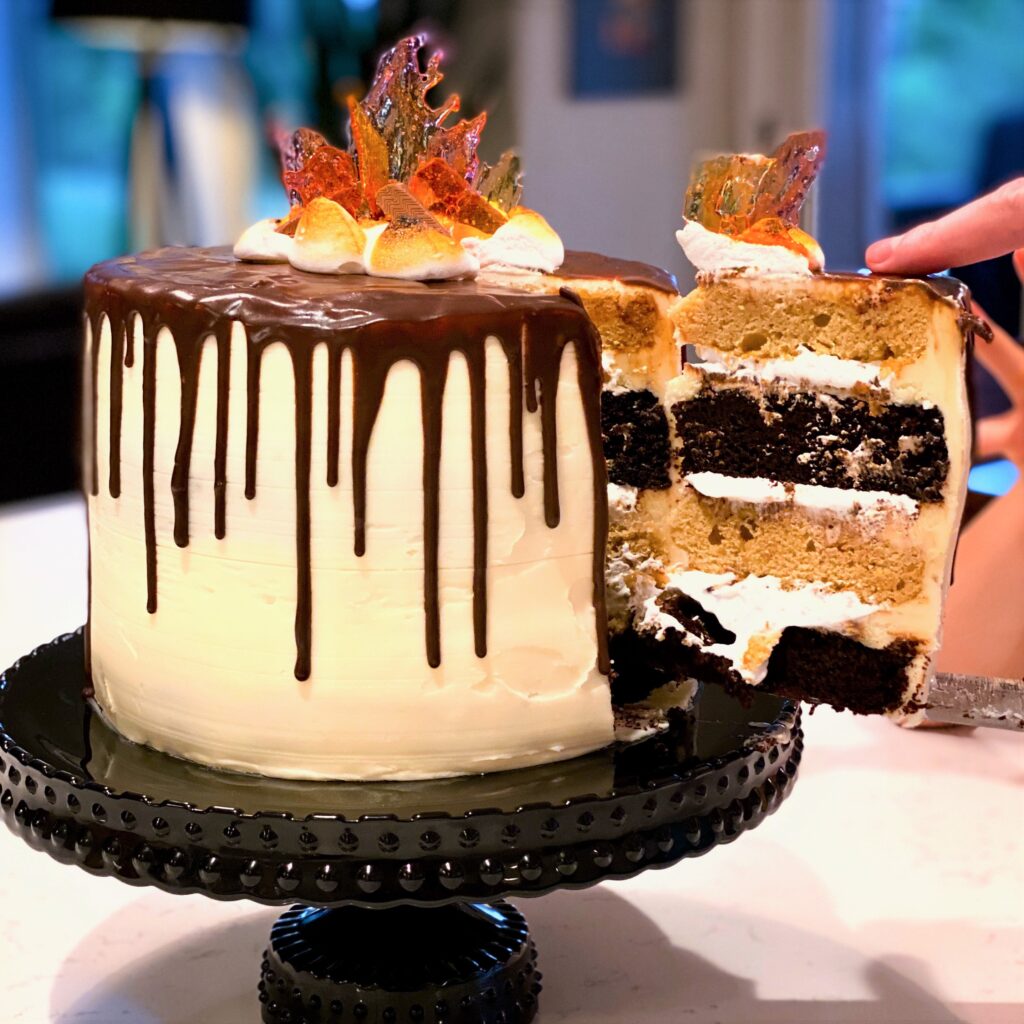
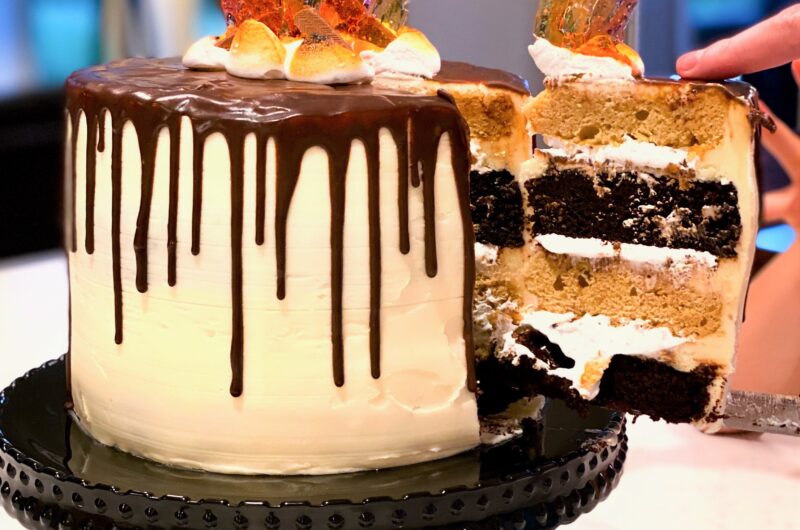
I lovingly refer to this creation as a Frankenstein Cake because I took components and recipes from several other desserts and places to create the final product. I will put all the links in here and then provide the recipe I created for the honey graham layer. I did give myself a pat on the shoulder for that successful bit of recipe work.
So, let’s start by breaking down the components of this cake:
- 2 layers of dark chocolate sponge from this recipe.
- 2 layers of honey graham sponge: see recipe below
- Double batch of vanilla frosting.
- One batch of marshmallow fluff with mini chocolate chips and crushed graham crackers folded in.
- One batch of chocolate ganache for filling and drip.
- Cinnamon and Butterscotch hard candy for flames.
- Mini Twix bars cut in half for logs.
Here’s how I plan the process for a cake like this with so many components.
Up to a week before I planned to decorate the cake, I made the sponge layers and froze them wrapped in plastic wrap and foil. This helps develop the flavors, and it’s a huge advantage to have very cold cake when putting the cake together.
The day before I want to put the cake together, I made the buttercream. I kept it in the fridge overnight, then just set it out on the counter the next day to soften while I got the rest of the components ready.
The day I wanted to put the cake together, which was the same day I wanted to serve it, I started by making the marshmallow fluff and chocolate ganache. I separated out some marshmallow fluff to keep plain for the top of the cake. I added mini chocolate chips and crushed graham crackers to the rest of the marshmallow fluff for filling the inside of the cake. The chocolate ganache went directly into a squeeze bottle to cool and sit at room temperature until I was ready to use it.
*It is helpful to have a large space cleared in the refrigerator to assist with cooling the cake multiple times in this process. I fully appreciate having an extra fridge when I’m making big things like this.
Putting the Cake Together:
- Choose your cake plate or cake board. Smear a small amount of buttercream on the surface to help keep your cake from sliding off.
- Place a layer of the frozen chocolate cake on the plate. Smear it lightly with buttercream, then pipe a thick ring of buttercream around the edge, and a blob of buttercream in the center (This helps support the cake and keep your fillings from oozing out.) Refrigerate until the buttercream is firm.
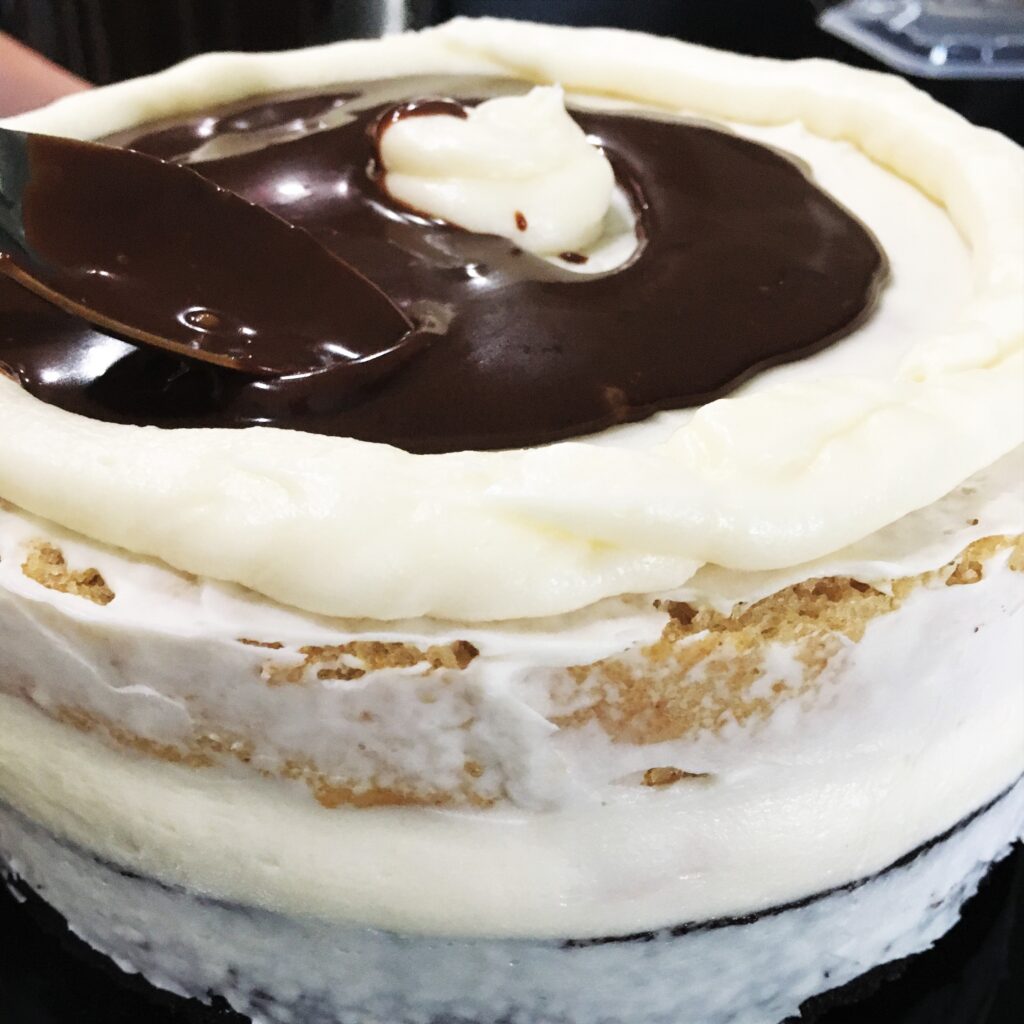
- Add a thin layer of the chocolate ganache.
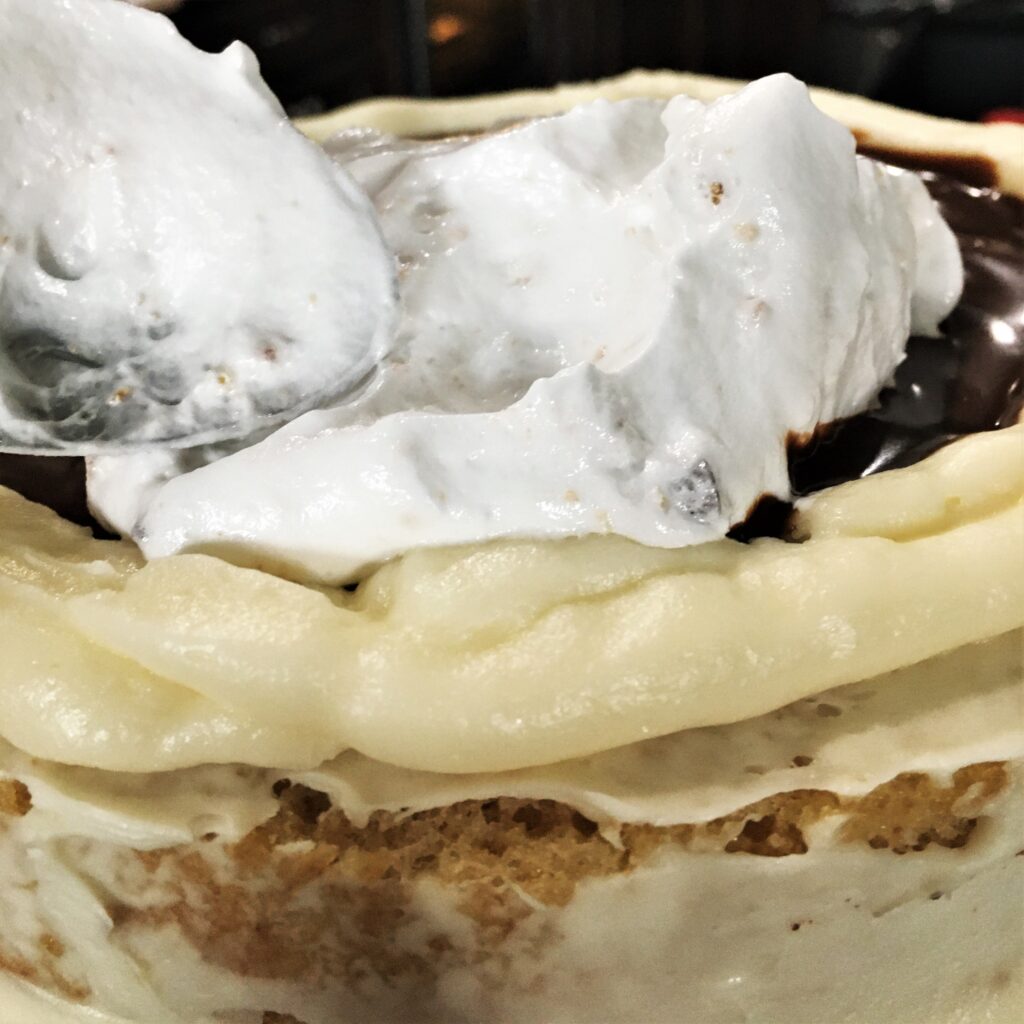
- Gently spoon the marshmallow fluff over the chocolate ganache, being careful not to overflow the buttercream ring.
- Using a kitchen torch, toast the marshmallow fluff trying to avoid melting the ring of buttercream on the outside.
- Refrigertae until the buttercream ring is firm again.
- Repeat steps 1-6 with a graham layer and a chocolate layer.
- Place the last graham layer on top and stick a fat straw, or wooden rod, into the center of the cake for stability.
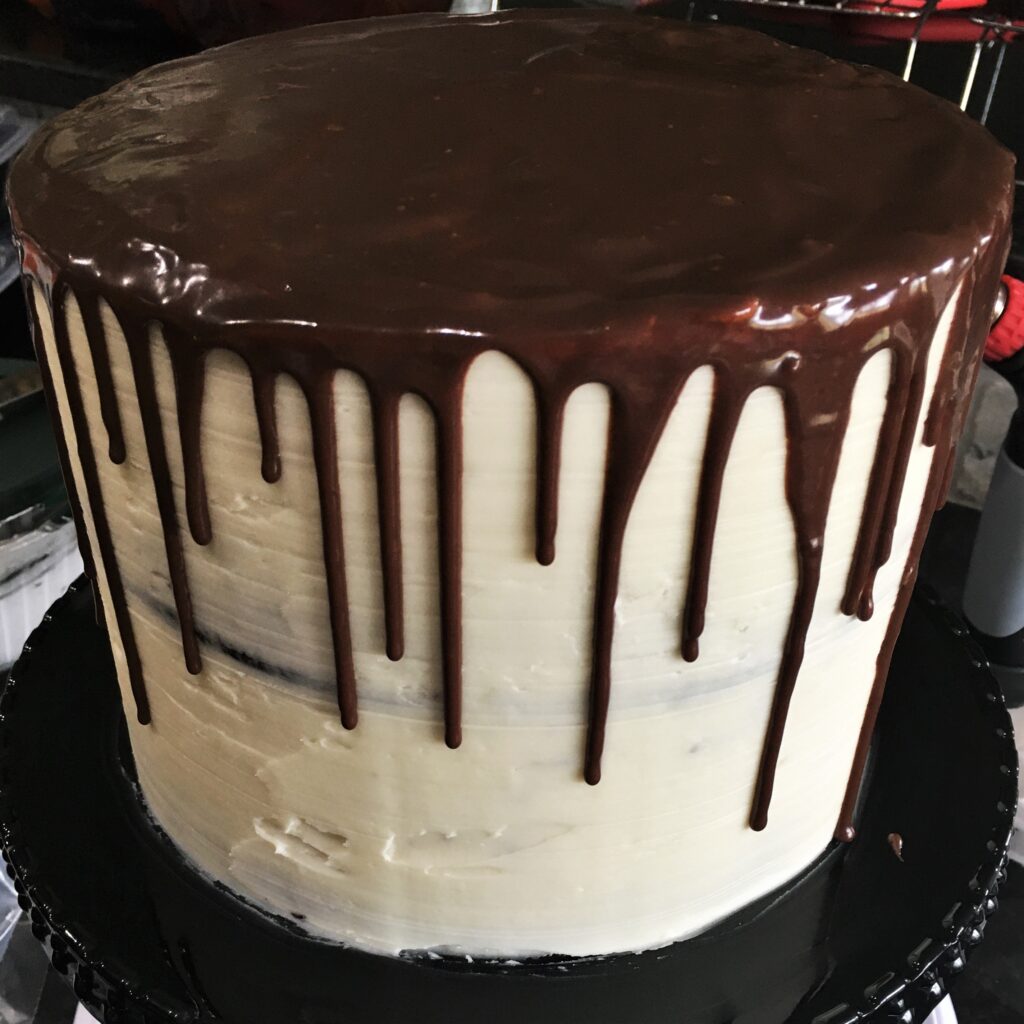
- Crumb coat the whole cake with the remaining buttercream.
- Refrigerate until firm.
- While the buttercream is firming, set the oven to 300° to make the flames. You will need to line a cookie sheet with parchment paper. Crush the cinnamon and butterscotch candies and arrange them on the sheet so they will melt and mix together. Allow the candies to melt in the oven for 5-10 minutes. Use a toothpick to meld the colors and allow to cool completely.
- Add the chocolate drip topping.
- While the chocolate drip is cooling, break your candies into large, flamelike chunks. Cut your mini twix bars in half. Fill a piping bag with a large round tip and the plain marshmallow fluff.
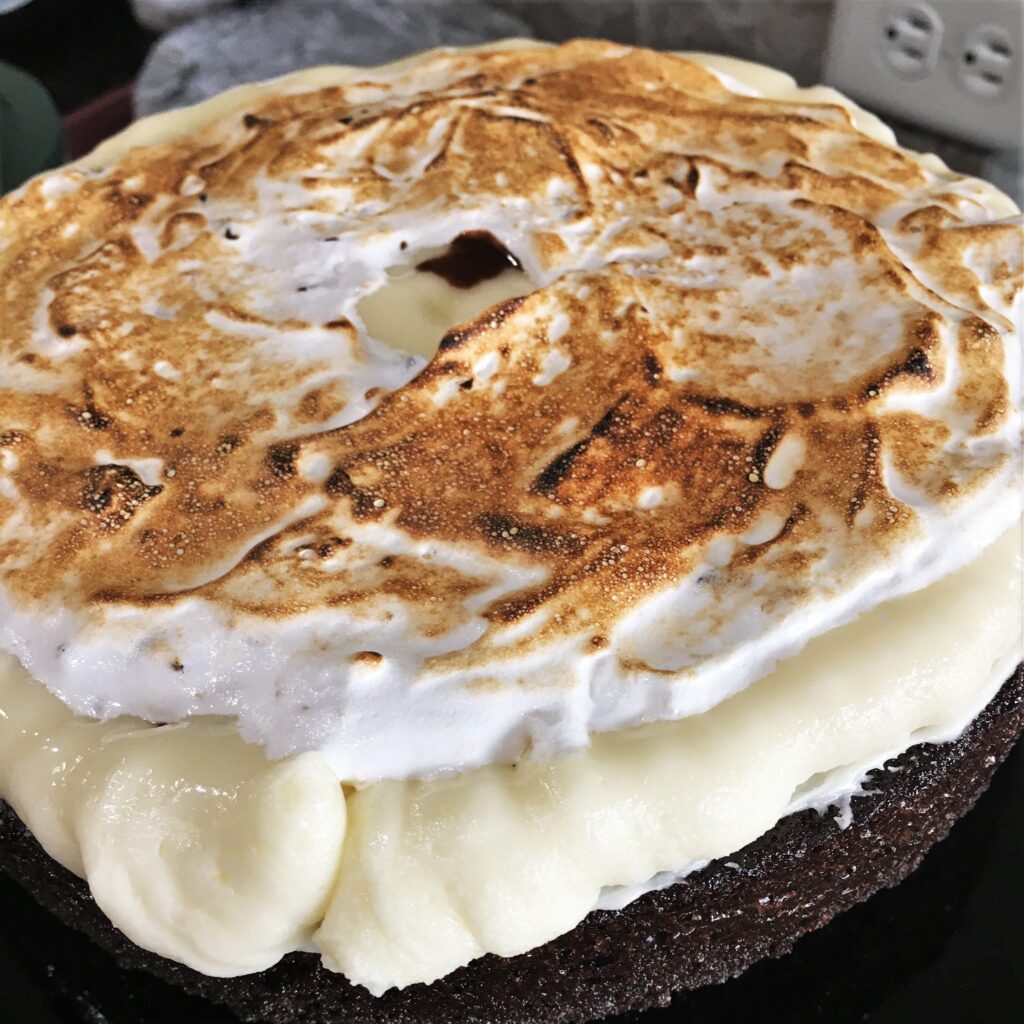
- When the chocolate ganache is set, add puffs of the marshmallow fluff to the center of the cake. Torch them with a kitchen torch until they are golden brown and have some darker edges.
- Arrange the cut twix bars and hard candy flames on top of the toasted marshmallow fluff.
Ta Da!
Please share your feedback if you make this cake! I’d love to see your pictures and hear about how this goes for you. I try to make my directions as clear as possible, but we are all coming from different backgrounds and experience, so your feedback can only help me improve.
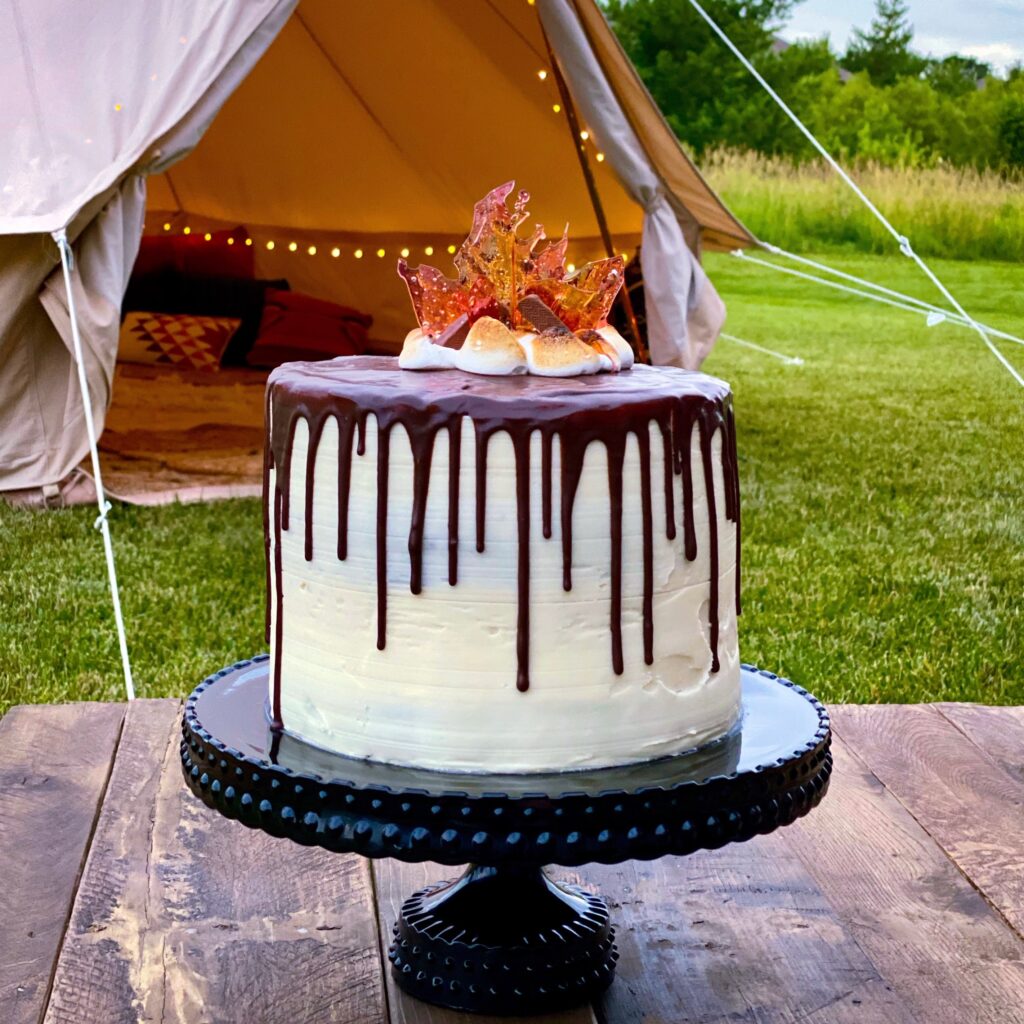
Big thank you to @kansascitybucketlist for the awesome pictures of the cake in front of the chic tent and the pictures of the cut! Wowza!
Honey Graham Cake
Course: Dessert12
servingsIngredients
1 cup unbleached all purpose flour
1/2 cup whole wheat flour
1/4 tsp baking soda
1 tsp baking powder
1/4 tsp salt (I used vanilla salt)
1/2 cup (1 stick) unsalted butter
1/4 cup granulated sugar
1/4 cup light brown sugar
1/2 cup honey
2 large eggs, room temperature
2/3 cup whole milk
1 1/2 tsp vanilla
Directions
- Preheat the oven to 350° F . Spray and line two 8 inch pans with parchment paper and baking spray.
- In a medium bowl, whisk together the flours, baking soda, baking powder and salt.
- In a bowl or glass measuring cup, mix together the milk and the vanilla.
- In the bowl of an electric mixer fitted with the paddle attachment, beat together the butter, sugars, and honey until well combined on medium speed. (2-3 minutes)
- Add the eggs, one at a time, beating well after each addition.
- Reduce the speed to low. Add 1/2 of the dry mixture mixing until just combined. Add all of the milk, then the remainder of the dry ingredients mixing just until combined.
- Divide the batter into the two pans and place in the oven.
- Reduce the oven heat to 325° F and bake for 23-27 minutes. Use a toothpick to check if the cake is cooked all the way through. If the toothpick comes out clean, the cake is ready to come out of the oven.
- Cool for 10 minutes before removing from the pan.
- Cool completely before wrapping to freeze or decorating.