
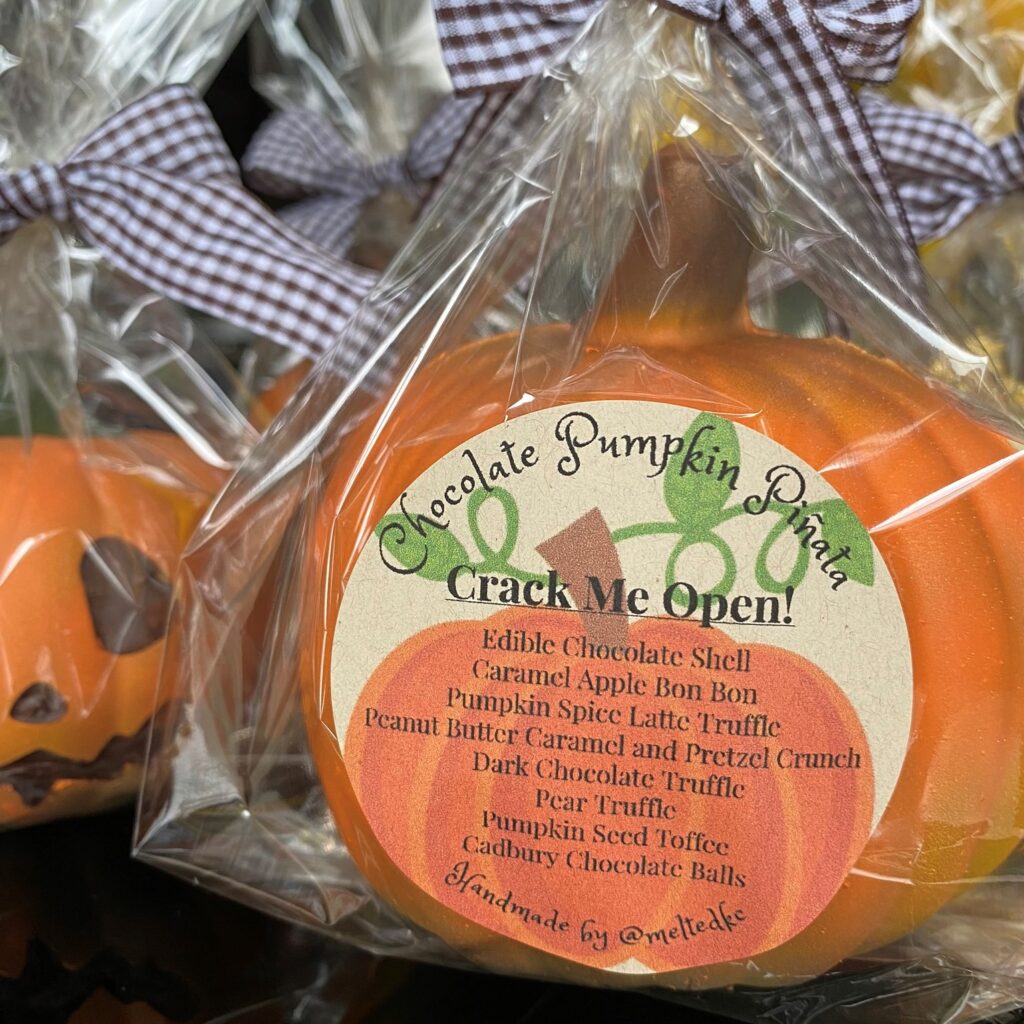
A completely edible confection that explodes with your favorite fall chocolates.
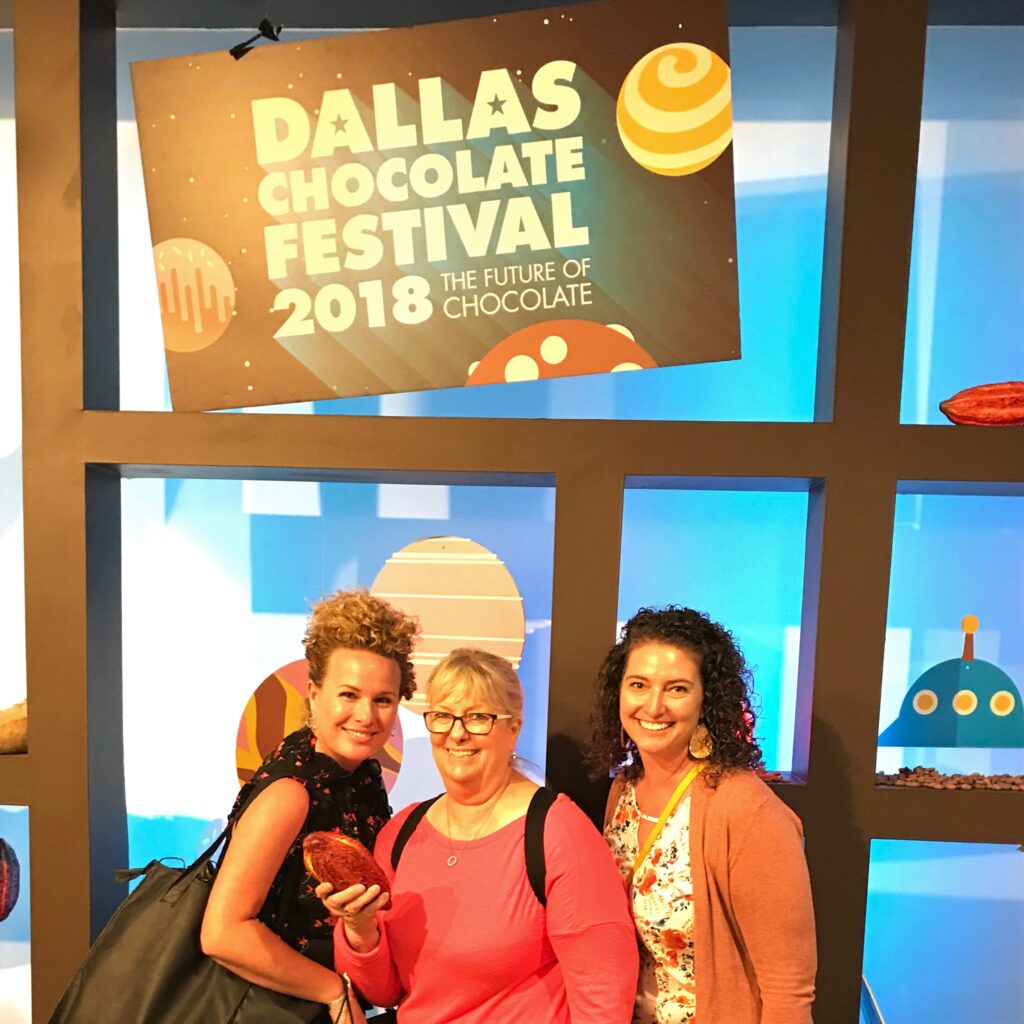
A couple years ago, my mom, older sister and I attended the Dallas Chocolate Festival in Dallas, TX. It was, arguably, my first “girls trip,” and it was a lot of fun. Who doesn’t want to attend a festival that’s all about chocolate? We attended workshops, learned how to make French Macarons from an actual French chef, and gained an incredible amount of inspiration for flavors as well as bon bon design ideas. One of our favorite booths was Kate Weiser’s chocolate booth, which was filled with beautifully colored bonbons, and bonbon filled chocolate pumpkins. See what I mean by inspiration?
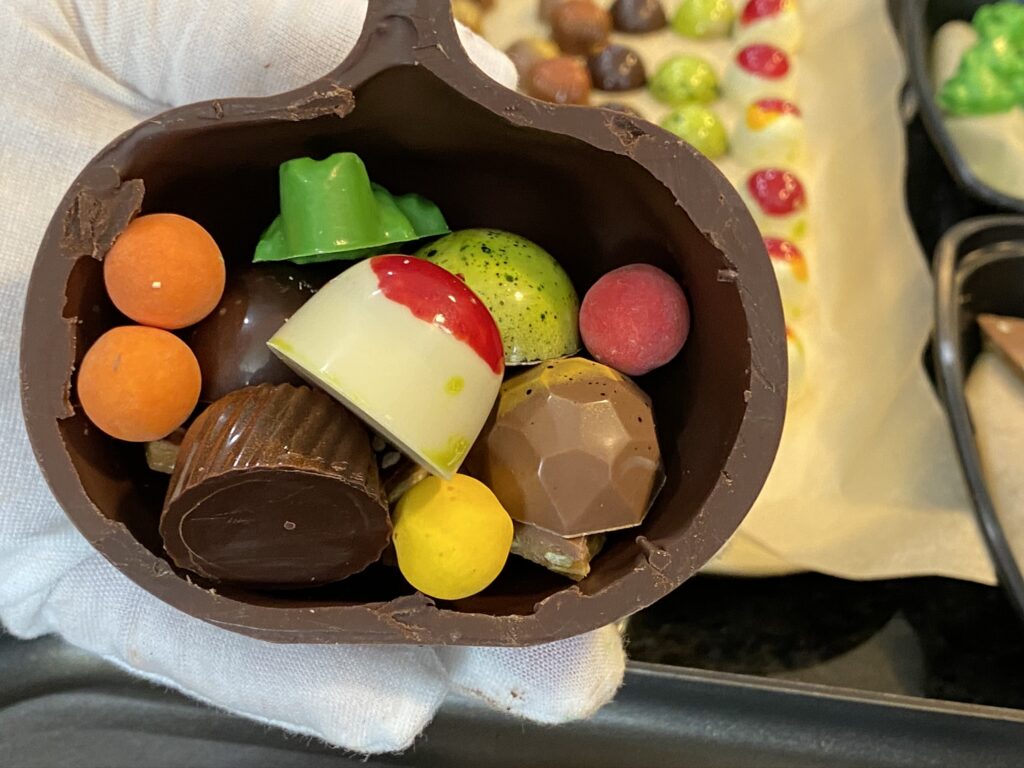
I purchased a chocolate pumpkin to take home for the family. We were all amazed and filled with childish joy; busting that beauty and discovering the goodies inside. Chocolate covered fruit, bonbons, malted balls, and a little green chocolate frog spilled out of the cracked shell; which we devoured like the chocolate goblins we are. My mind immediately set to work, figuring out how I could repeat that experience at home as well as share it with others. Imitation is the highest form of flattery, right? Thank you Ms. Weiser for the inspiration.
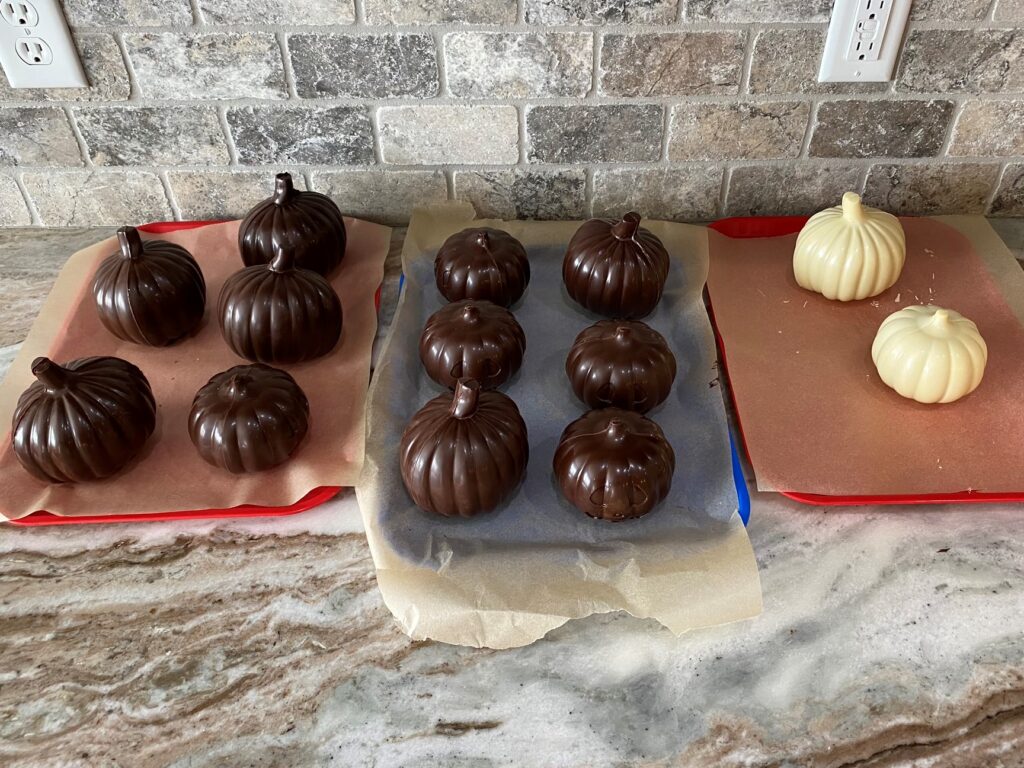
I set to work creating pumpkin piñatas of my own. This started out with finding molds that would work for the job. Firm polycarbonate molds are most ideal for quality chocolate work, but I had a hard time finding large enough pumpkin molds in polycarbonate. My mom came across some Mastrad Jack-O-Lantern molds, which are polycarbonate and include 3 sizes. These molds are great, and a lot of fun. I can’t find them anymore, as it seems Mastrad has switched to a skull for their Halloween mold. I also found larger 3D molds in flimsy plastic, which were more the size I wanted. I actually make pumpkin piñatas in both types of molds just for fun.


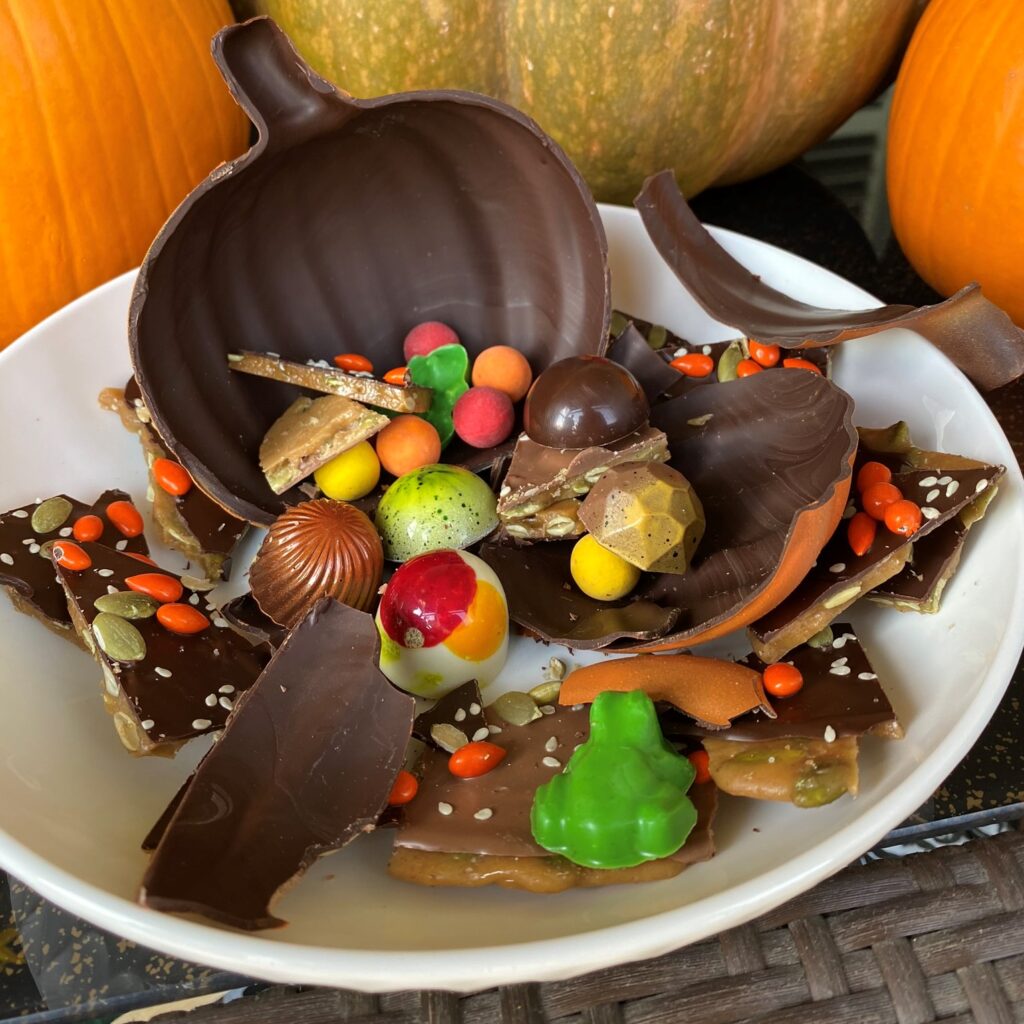
Deciding what to put in the pumpkins is the best part. Each year, it’s a little different because I switch up some of the fall bonbons that I make. I also like to pay attention to who I’m giving the pumpkins to, as I want to be considerate of allergies and such.
Every year, I include fillers like pumpkin seed toffee (nut free) and Cadbury Havest Balls (nut free). I do always add at least one green chocolate frog as well (nut free). This year, the frogs were made of colored white chocolate mixed with culinary crystals (unflavored pop rocks) and Rice Krispies. Two bonbons that always make the fall cut are dark chocolate truffles and pumpkin spice latte truffles. 2020 bonbon varieties include a milk chocolate pear truffle, a caramel apple bonbon, and a peanut butter caramel with pretzel praline. I know, the PB bonbon went off my allergy friendly kick, but I knew that I wasn’t gifting these to folks with allergies this year and our family nut allergy isn’t to peanuts.
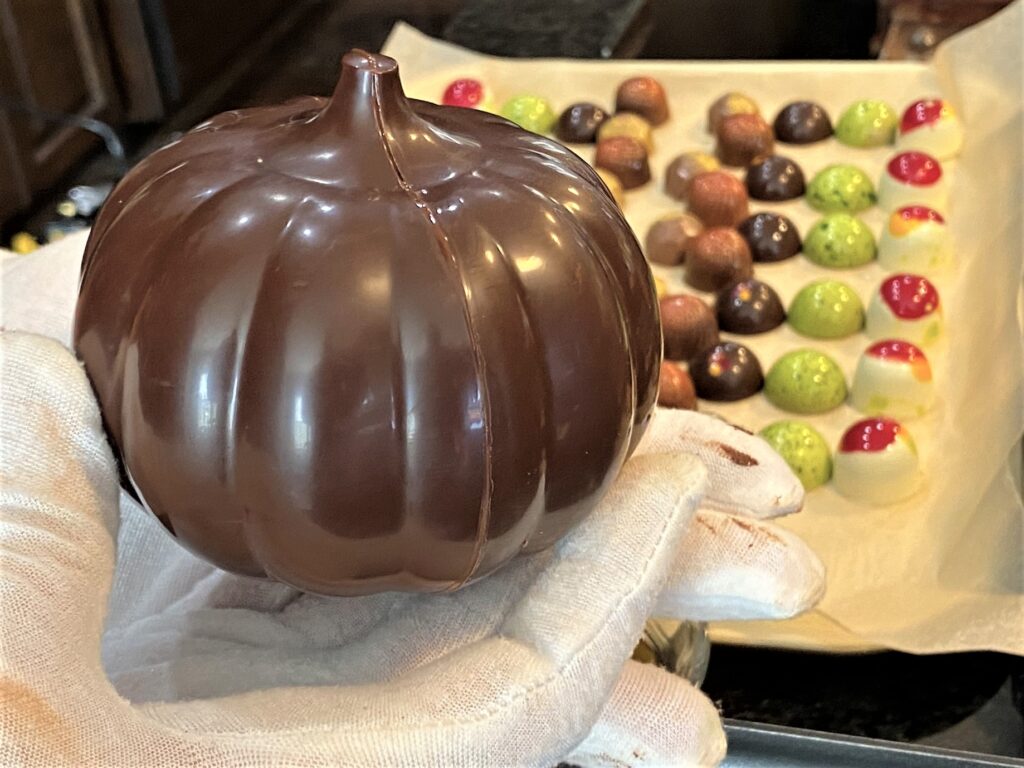
I use high quality, tempered couverture chocolate to make the shells. I did most in dark chocolate this year, but I did do a couple in white chocolate just to see how they would look. I loved the look of the white chocolate, but not as many people enjoy eating white chocolate. Dilemmas. I do think you could use candy melts, or other melting chocolate like Ghirardelli, which would be easier and less fussy to make these piñatas.
Check out this video of me putting a pumpkin together:
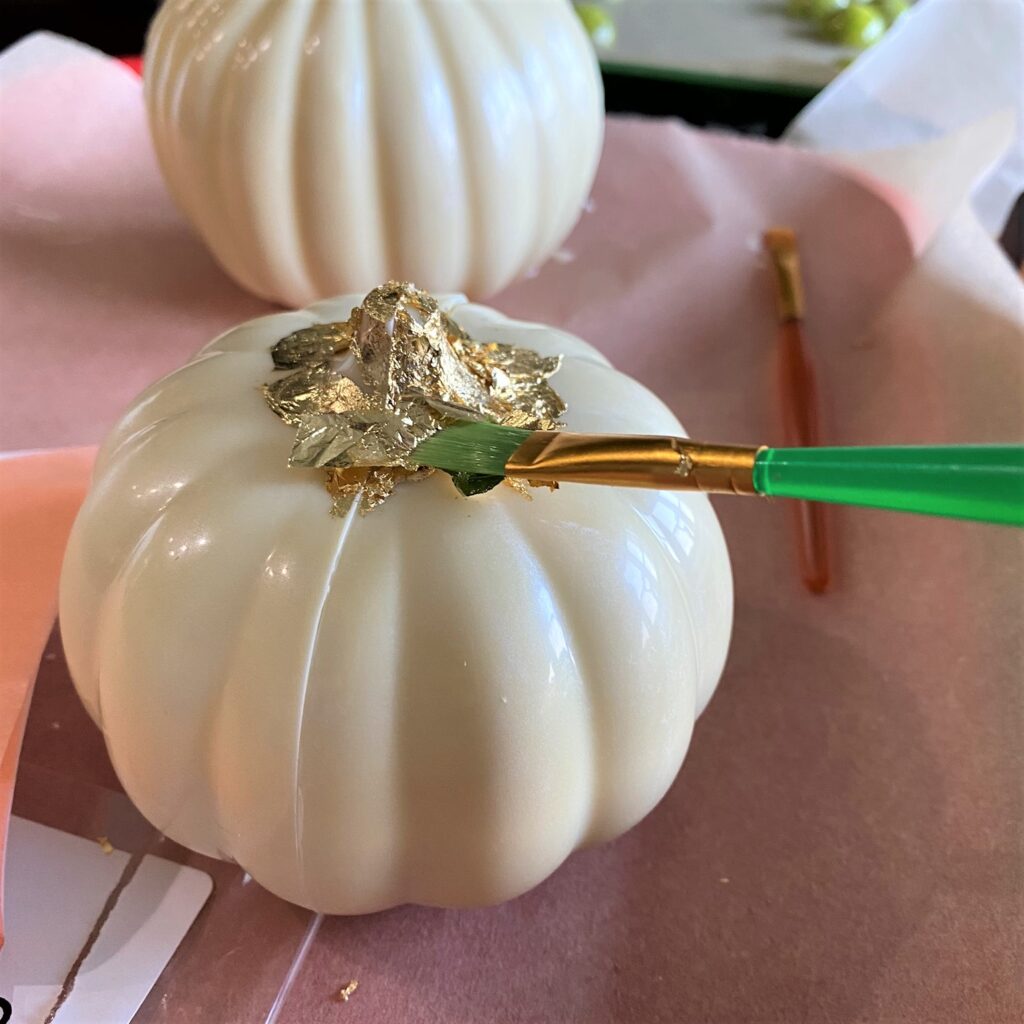
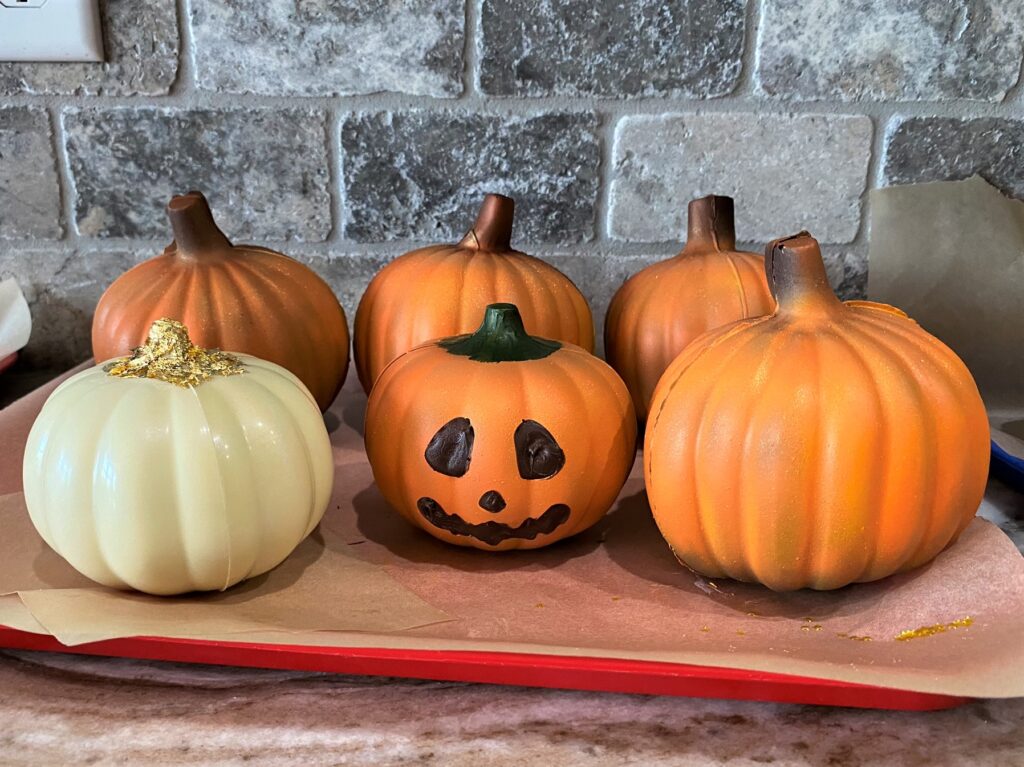
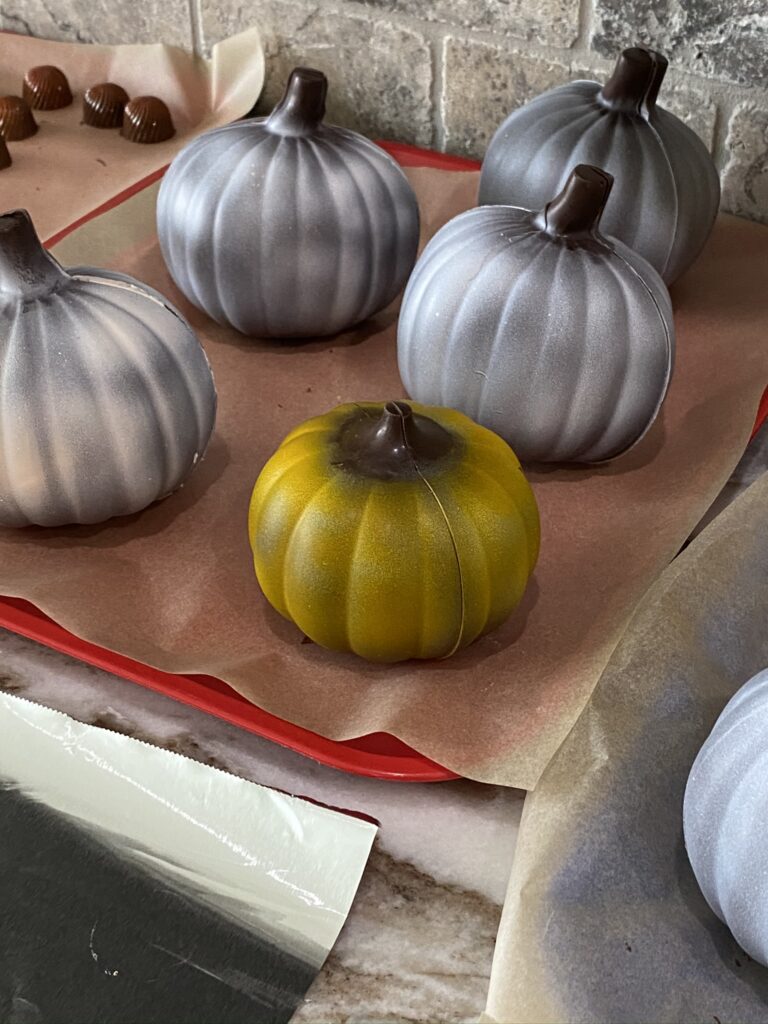
For the white pumpkins, I dusted the molds with an edible pearly shimmer powder before making the shell with white chocolate. After they were put together, I used edible gold leaf to coat the stem.
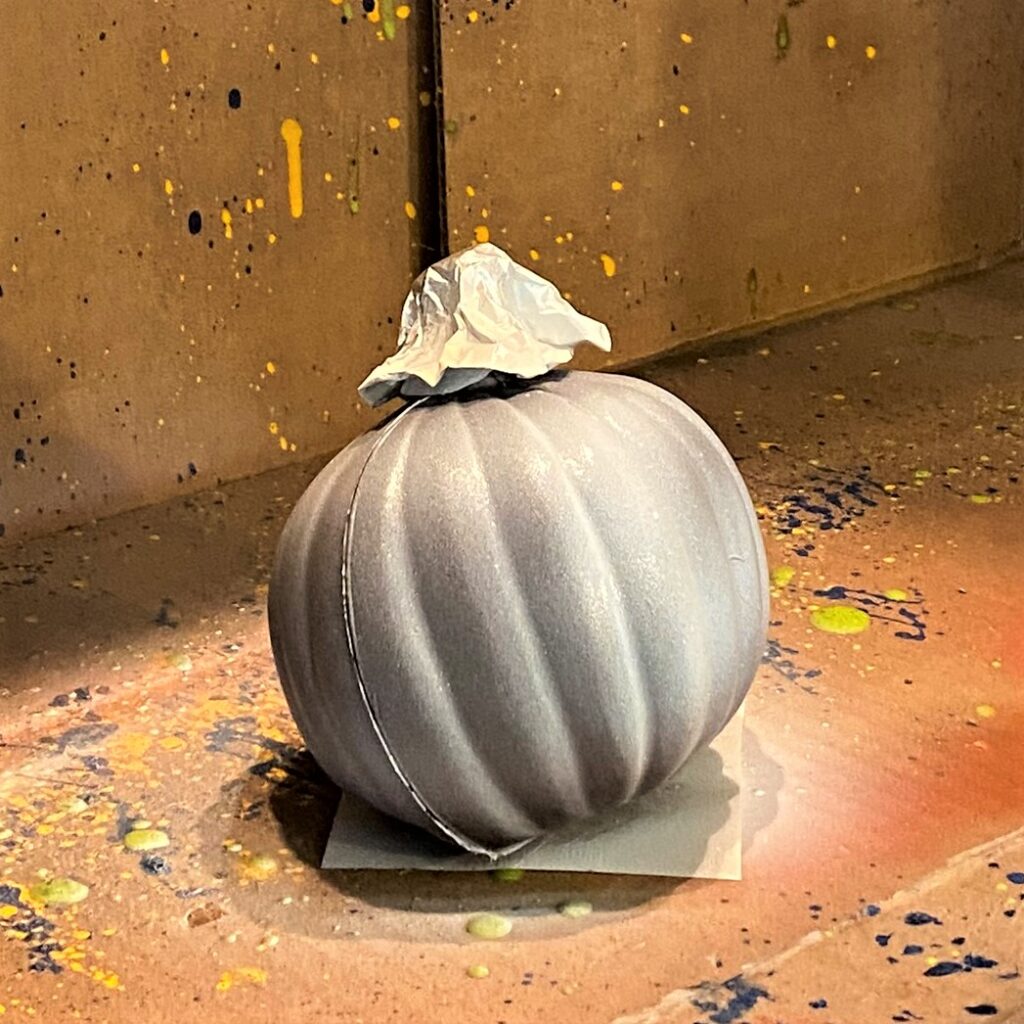
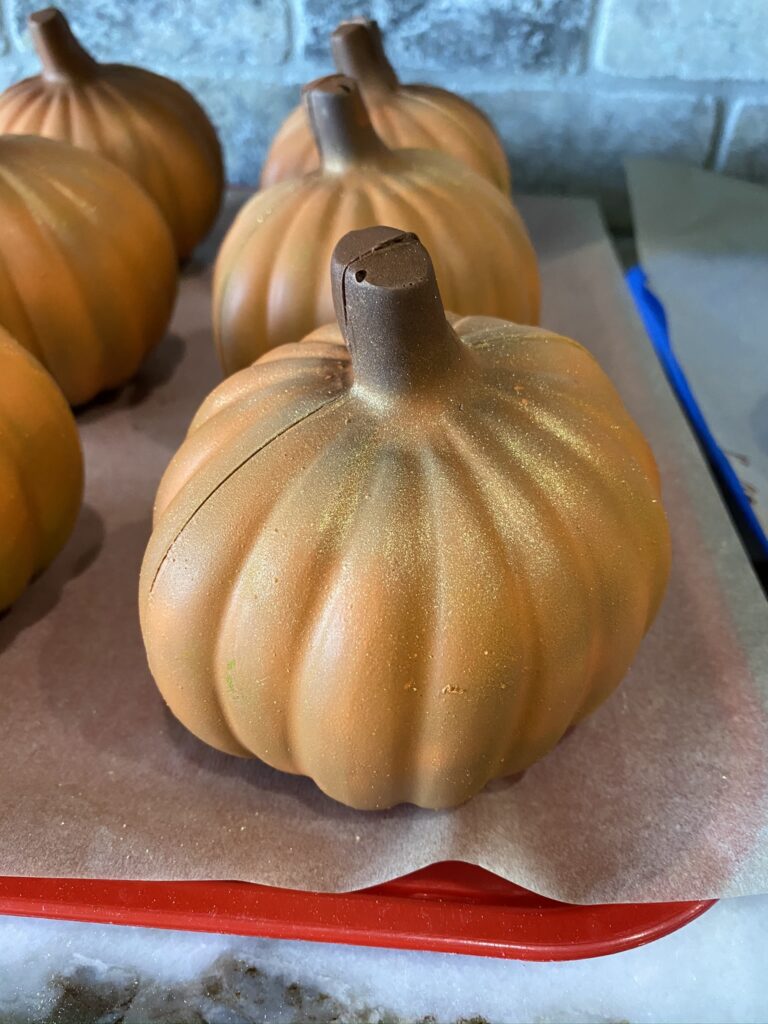
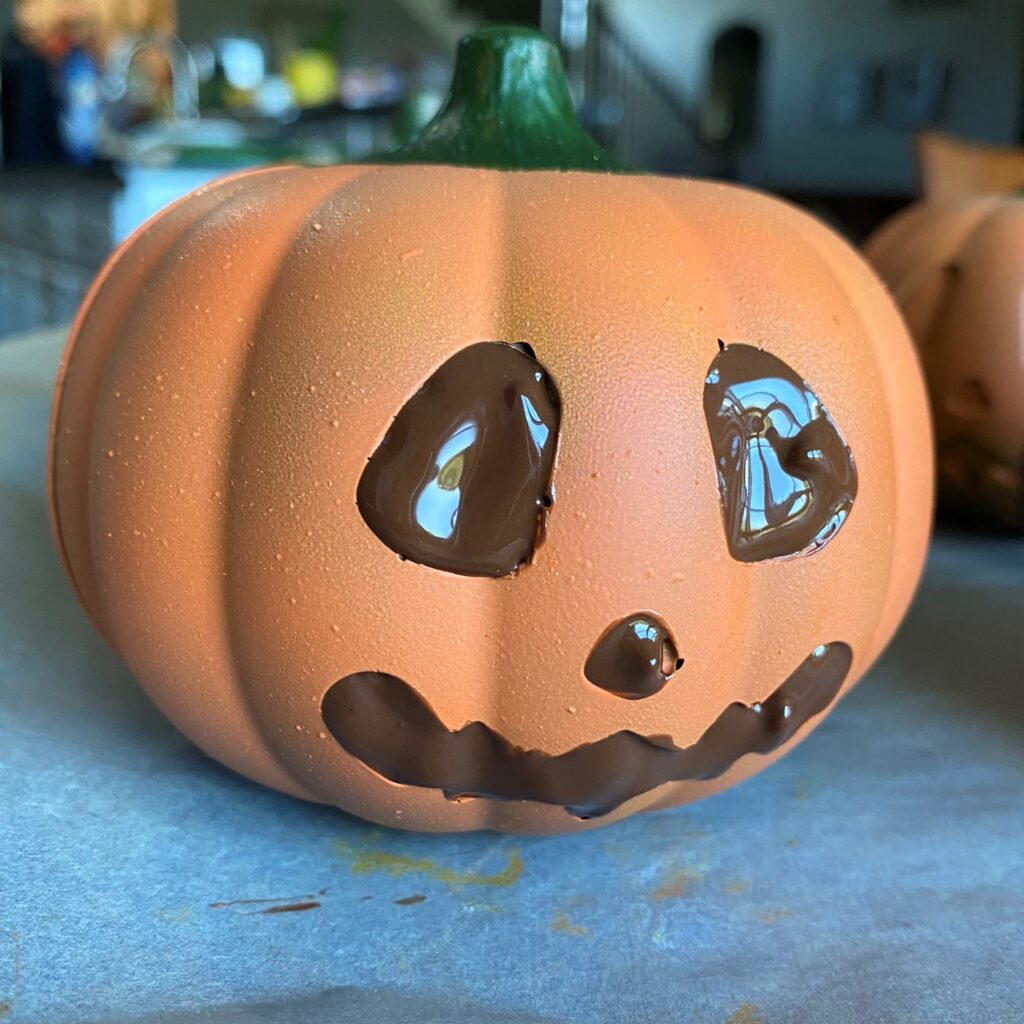
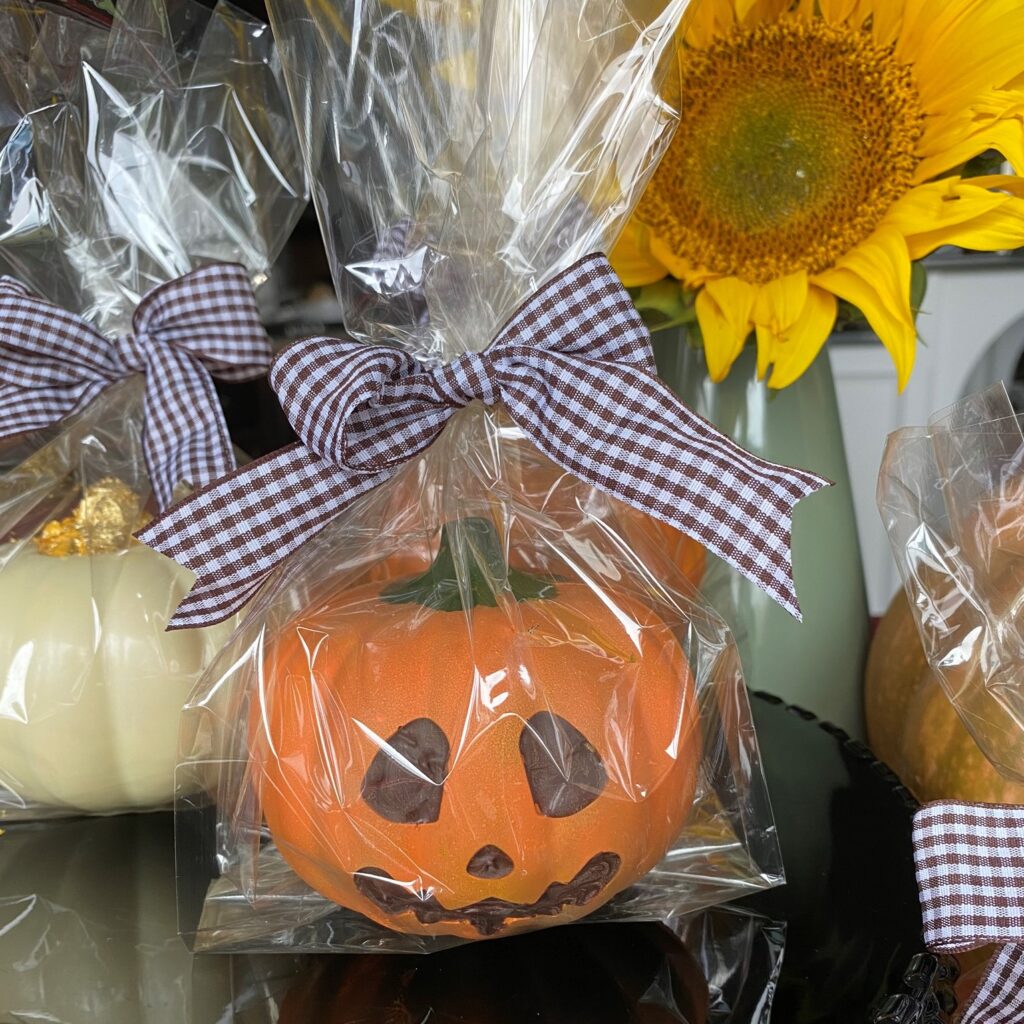
For the large dark chocolate pumpkins, I sprayed a series of colored cocoa butter onto the pumpkins after they were put together. Spraying the colorant onto the finished pumpkins gave the outside some texture, similar to a real pumpkin. I used white, then a yellow, and finished with a pumpkin orange. I sprayed some copper color onto the stem, then dusted the tops of the pumpkins with gold shimmer powder.
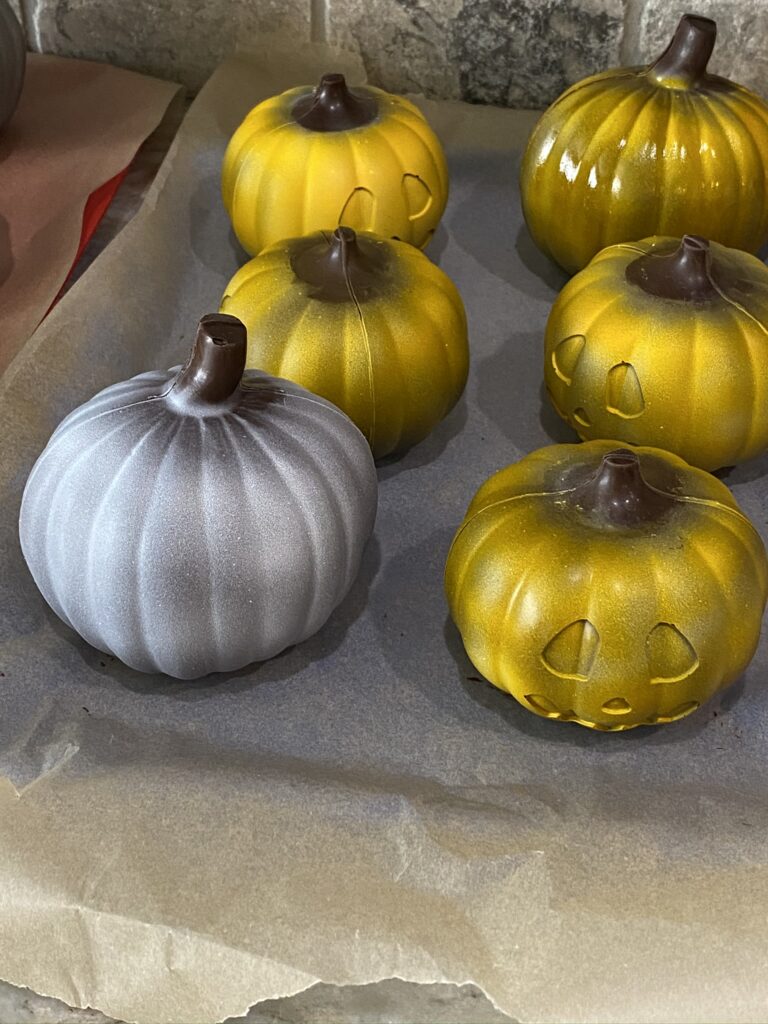
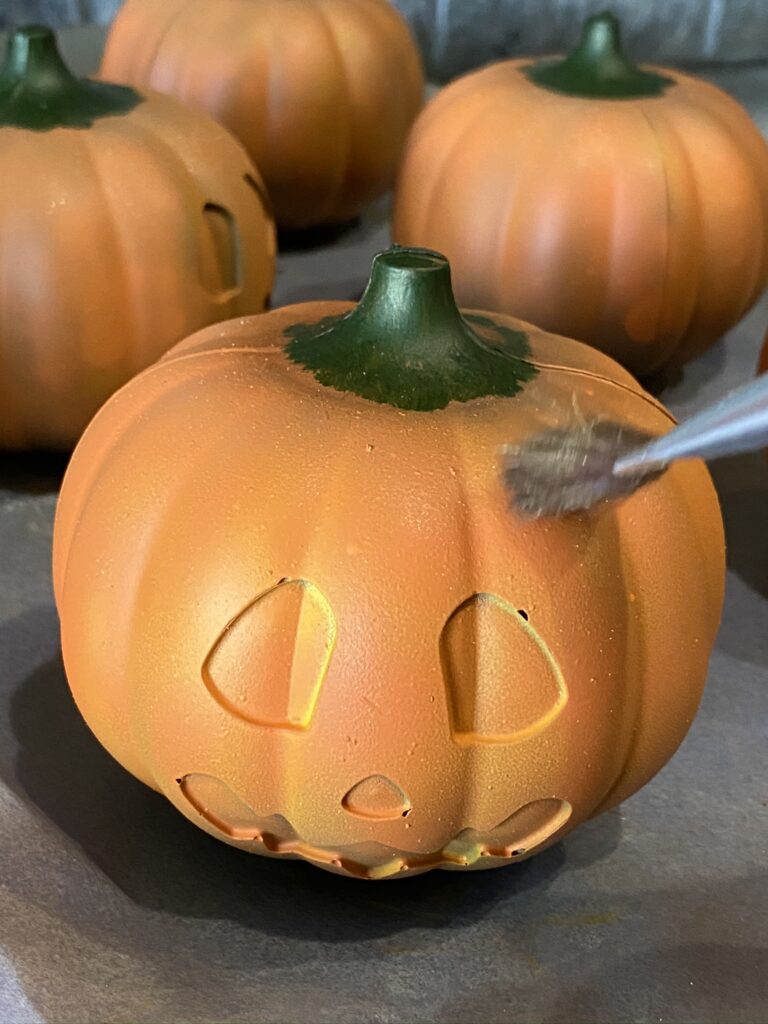
I used the same process for the smaller Jack-O-Lanterns. The only differences with those is that I painted green cocoa butter onto the stems and then used dark chocolate to fill in the face.
Once completed, it was time for my favorite part. Giving and sharing.
Check out these videos of piñata breaks:
Photos of all the 2020 goodies:
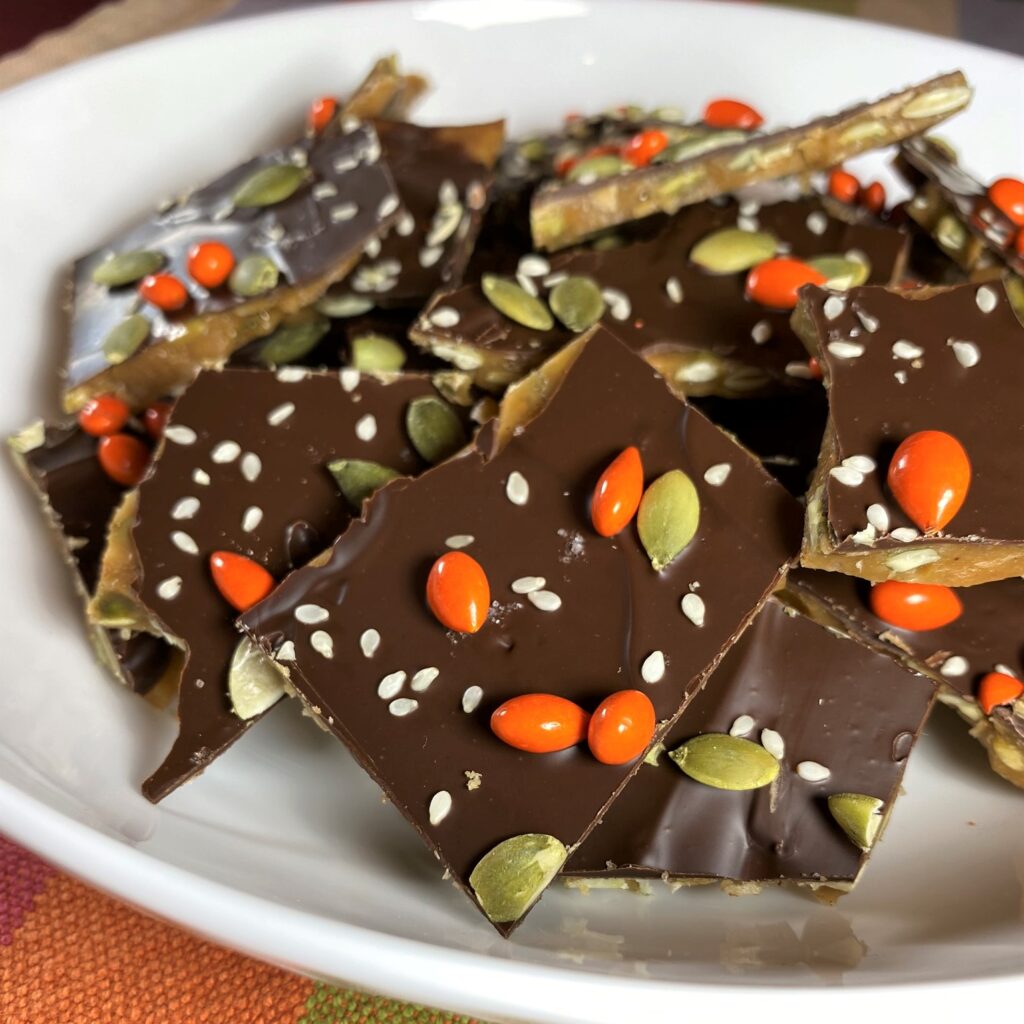
Pumpkin Seed Toffee 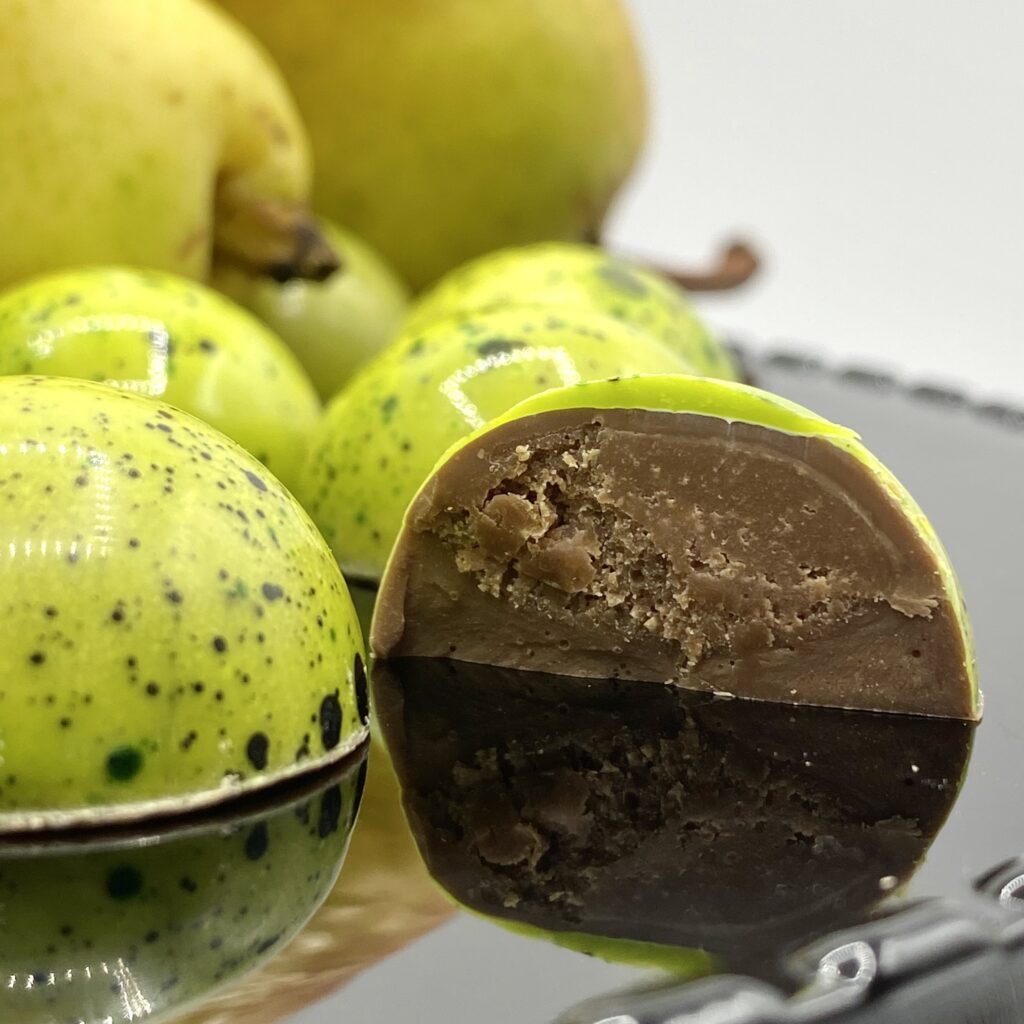
Milk Chocolate Pear Truffle 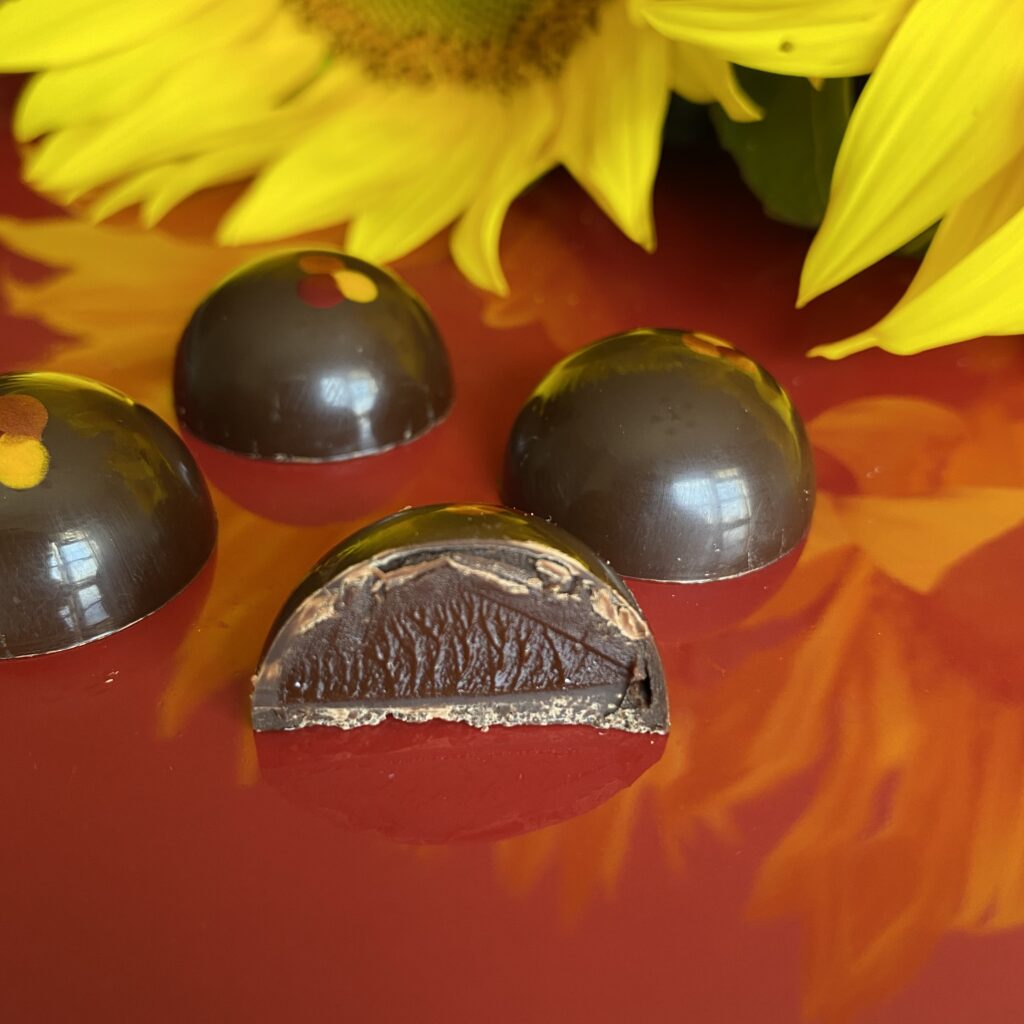
Dark Chocolate Truffle 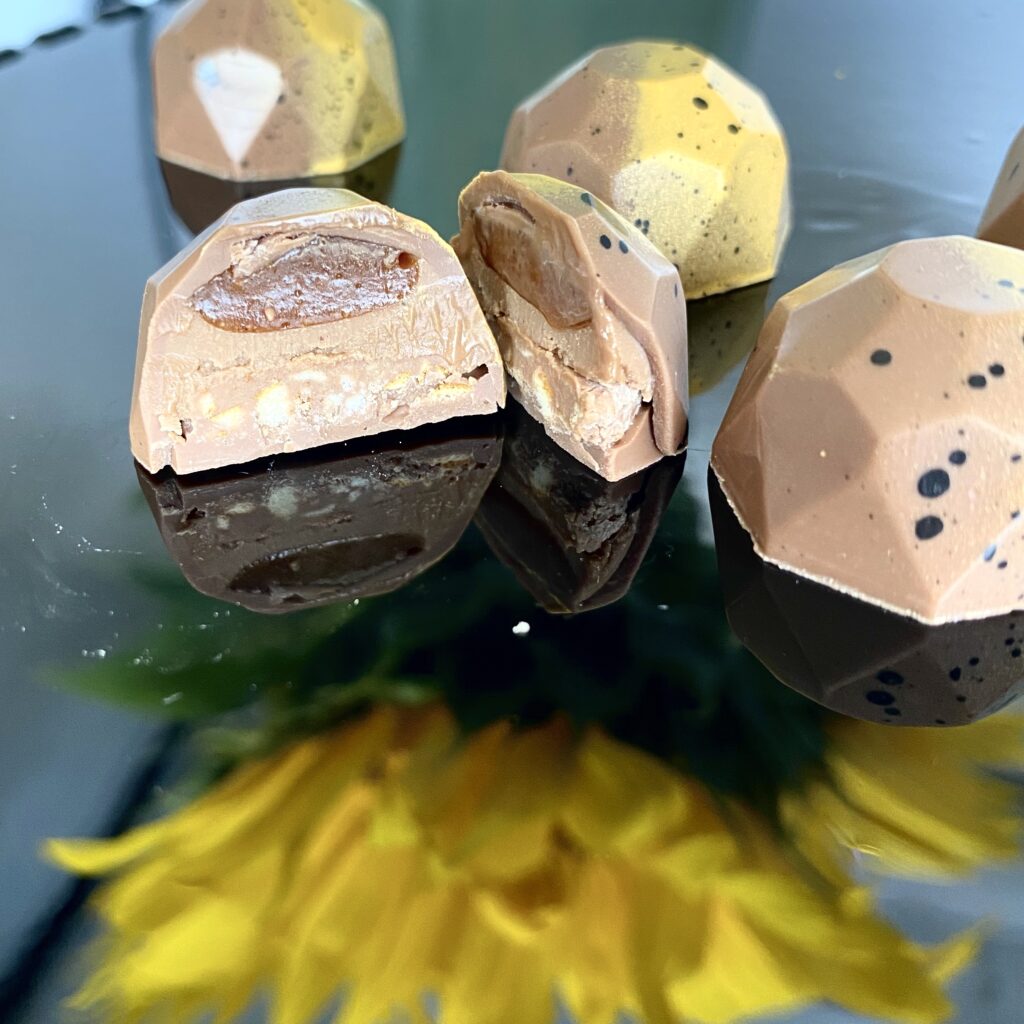
Peanut Butter Caramel with Pretzel Praline 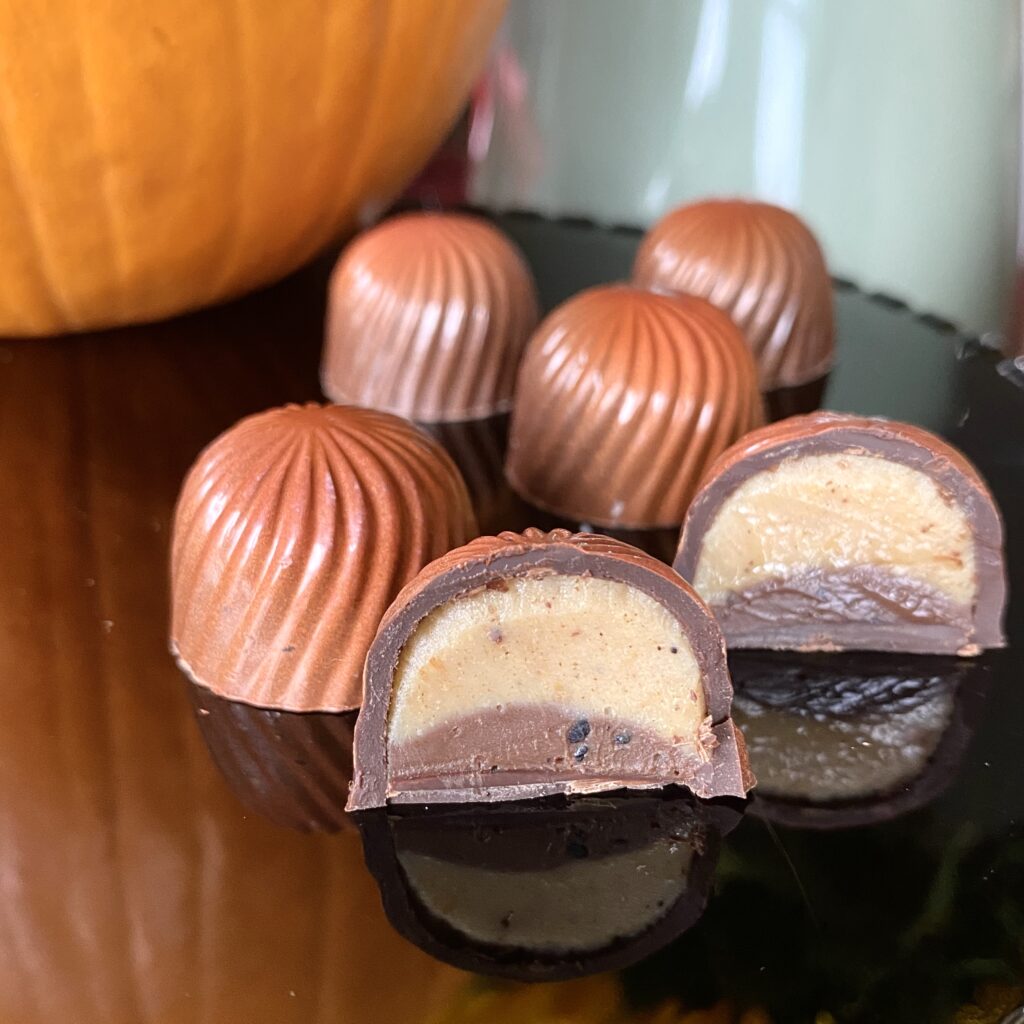
Pumpkin Spice Latte 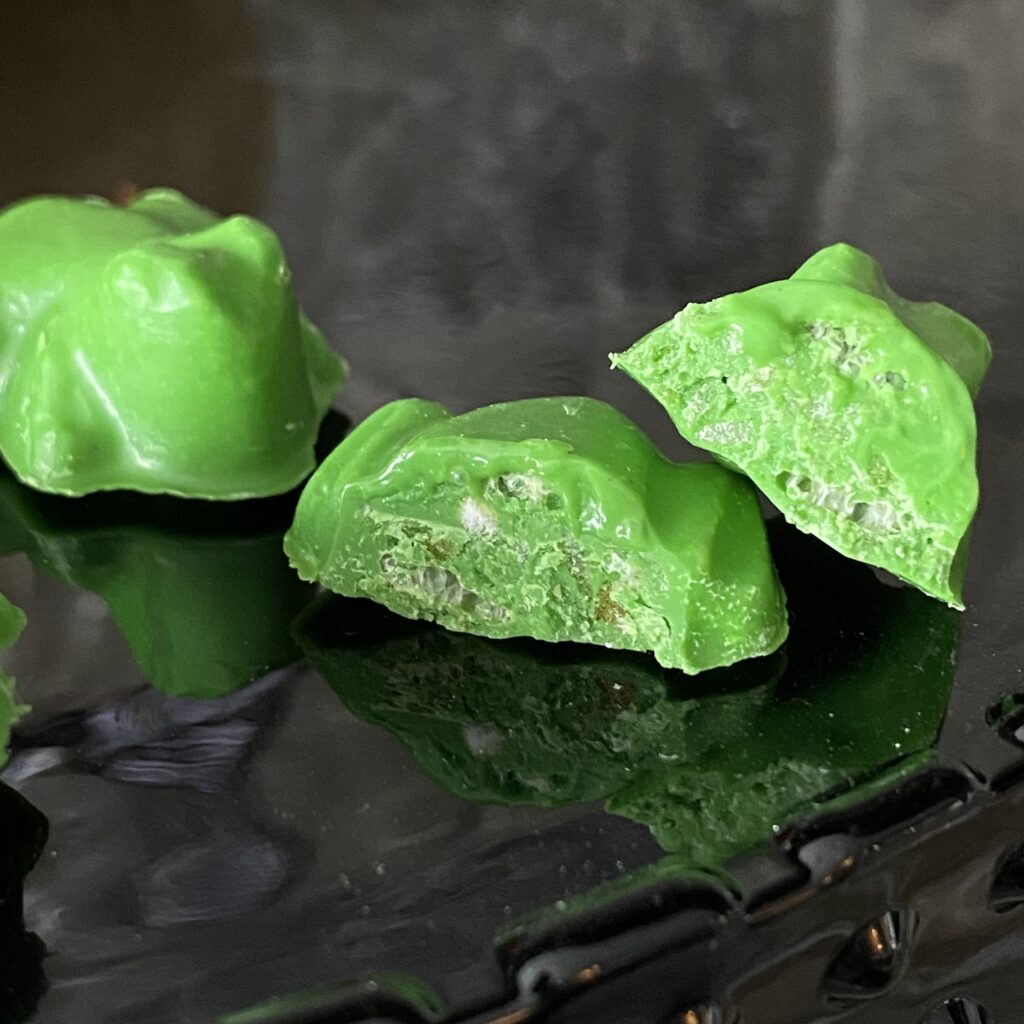
Chocolate Frog
10 Comments